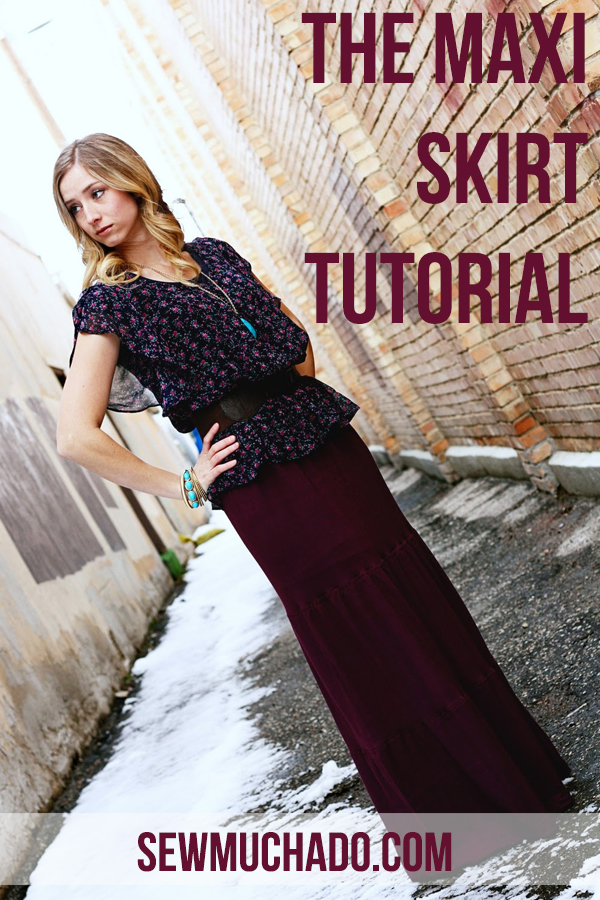
The Maxi Skirt. They’re everywhere right now. They’re long, they’re flowing, and the best part is they’re comfortable. They bring a feminine bohemian vibe that I can’t resist.
Anthro sells a couple of styles that I love here and here (if only I could rock horizontal stripes like the model):
But for around $100, why not make 5 of your own? My very stylish little sister Audy asked me to make a Maxi Skirt tutorial (she’s one of those people we all hate that can rock horizontal stripes). And since I might not have been cool enough to think of it on my own otherwise, I’m glad she did so I can share it with all of you! I hope you make a few of your own — I can’t wait to make another skirt in a print!
Materials Needed: (affiliate links below)
1.5-2 yards 60″ wide knit fabric (hip measurements greater than 38″ will need closer to 2 yards) 2″ wide elastic (for measurement see below) Ballpoint needle
Pieces to Cut:
From Elastic:
Pull elastic around waist how you’d like to it sit in the finished skirt, add 1/2″ to that length, and cut.
From Knit Fabric (write your measurements as you follow along and you’ll have your fabric cut in no time!):
For the waistband, cut a piece of knit fabric that is approximately 6″ longer than the length of your elastic and 5″ wide. Before cutting, double check that that length will stretch enough to comfortably be pulled over your hips, and cut extra length if needed.
Next, decide how long you want the skirt to be. Measure from where the bottom of the waistband will sit to the floor, or just above, depending if you want your maxi skirt to hit the floor or not. Divide that number by 3. Add 1″ to that measurement to allow for 1/2″ seam allowances. That will be the length of the top two panels of the skirt.
The bottom panel will be 1″ longer than the top two to allow for a 1.5″ hem allowance.
To determine the width of each panel, take your hip measurement and add 2-4″ for ease and seam allowance, depending on how tight you want the skirt to sit on your hips. I only added 2″ to my hip measurement because my fabric was very slinky had quite a bit of stretch. If your fabric has less stretch, you may want to add up to 4″ for ease and seam allowance. That will be the width of your top panel.
For the middle panel, add 10″ to the width of the top panel, and add another 10″ in width to the middle panel for the bottom panel (bottom panel will be 20″ wider than top panel). If the width of your bottom panel needs to be greater than 60″, just divide the width you need by two, add 1″ to that measurement for seam allowance, and cut two pieces that size. Right sides together, stitch the two pieces together along one short end of each, and treat it as one piece from here on.
Note: This skirt is VERY forgiving, so if your fabric allows to only add 8″ in width for each panel without piecing the bottom panel, or you want a more flared skirt and want to add a couple extra inches, go ahead. This is one of those few projects where you can alter the measurements a bit (excluding the length, of course!) and your skirt will still turn out great.
Here’s an example of what a person with 38″ hips and a desired length of 36″ from the bottom of the waistband would need to cut for the panels:
I would normally use a serger when sewing knits, but wrote this tutorial with the assumption that you don’t have one. If you have a serger — use it! It will work great. If not, the great thing about knits is that the edges don’t fray, so finishing seam allowances isn’t necessary.
If not using a serger, set your stitch length a bit longer than normal (2.5-3 on my machine), or use a very narrow zig zag stitch with a medium stitch length. A lot of machines also have a “stretch stitch” setting which also works great.
1. Overlap ends of elastic 1/2″ and stitch together using a zig zag stitch, forming a loop.
2. Right sides together, fold waistband fabric in half, and matching short ends. Stitch together along raw edges, forming a loop.
3. Wrap waistband around elastic and pin in place (the more pins the merrier – it will also help in the next step to stretch the waistband fabric enough so you can pin it without catching any elastic), matching raw edges.
4. Stitch raw edges of waistband together around the entire loop. As you stitch, you’ll need to stretch the waistband fabric gently and be careful to not catch the elastic in your stitches.
5. Fold top panel of skirt in half, right sides together, and matching short ends. Stitch together along raw edges. Repeat with middle and bottom panels.
6. Mark middle and quarter points on panels and waistband by using a marking pen, pins, or gently pressing the fabric in half and then in half again. Pin one raw edge of top panel to waistband raw edge, right sides together, and matching marks. The top panel will be larger in circumference than the waistband. Stitch waistband to top panel along pinned raw edges, stretching the waistband to match the circumference of the top panel as you stitch.
7. Using a low setting on your iron, gently press seam allowance toward top panel and topstitch on top panel 1/4″ below seam.
8. Right sides together, pin one raw edge of middle panel to bottom edge of top panel, matching raw edges and marks. The middle panel will be larger in circumference than the waistband. Stitch the two pieces together along raw pinned edges, stretching top panel as you stitch to match the circumference of the bottom panel.
9. Using a low setting on your iron, gently press seam allowance toward middle panel and topstitch on middle panel 1/4″ below seam.
Note: I experimented with gathering the top edge of each panel rather than stretching the smaller piece to fit the larger piece, but ultimately decided that I liked the look better without the gathering. You could try gathering each panel if you’d like, but remember to remove the gathering stitch after sewing pieces together since it won’t stretch with the gathers like you’ll need it to :).
10. Attach bottom panel to middle panel and topstitch using same method as described in steps 8-9.
11. Try your skirt on to double check that the length will be as desired (plus 1.5″). Turn bottom edge 1.5″ to wrong side and stitch in place with two rows of stitching.
CongratulationsOn Your Finished Maxi Skirt! You are done!
Look at you on u-create AGAIN…You’re so famous! Love the skirt, hooray for another tutorial! P.S. I love how you look like you’re on the verge of cracking up in the first pic!
That looks amazing. Thank you for sharing the tutorial. I’m your newest follower. I would love it if you linked your project up to my link party. More The Merrier Monday.
This is honestly one of my favorite patterns I’ve seen on the craft blogs since I’ve started. Not only is it in the realm of my abilities, but it’s so sheik and pretty. Plus the photography is gorgeous, and I love the tute color.
Sorry about gushing, this was just a real treat first thing in the morning.
Thanks so much for the tutorial. I made this last night in a little over an hour and it looks fantastic! I’ve been sewing for almost 30 years and have an overwhelming fear of stretchy fabric. I think this might have cured me. Thank you again!
Thanks so much for the tutorial. I just used it to create the waist of the my dream skirt. It is actually the one you have posted. come check it out if you like craftedbymama.blogspot.com
I’m working on this skirt and I’m having trouble since I’m just a novice with using this stretchy fabric. The fabric keeps bunching and I keep getting knots while stitching. Any advice? Thank you. By the way I love your blog and tutorials.
The Cake Engineer – It sounds like you may be having tension issues with your machine. I’d double check that your machine is threaded correctly, and also make sure the tension is on a regular setting, and also make sure you use a longer than normal stitch length. Hope that helps!
Hi – Thanks for posting this tutorial. It looks great! I have a question: do you think this would work with a cotton lawn or cotton voile fabric? I’m looking to do something lighter than jersey.
Thank you for recommending a ball point needle! I have never even heard of one and I have followed several other tutorials on other blogs using knits, no one ever mentioned it. I have it on my shopping list, as soon as I get one I will make this skirt. It looks lovely! Thank you.
I got a ball needle this weekend and made a gray maxi skirt. I love it! I also love your blog and added your button to mine, thank you for all your tutorials!
great first project for me. i inadvertently bought fabric that you can see through. i’ve heard that silk fabric is difficult to work with, but i dont believe my skirt would be nice with polyester lining. what would you recommend?
Learning how to sew a dress is very easy. The only tricky part in learning this skill is learning how to draft a pattern as well as measuring your body. But once you learn these, everything else is easy.
I found this tutorial on Pinterest and I think it is just fabulous! Thank you so much for sharing! I have featured this project on my Pinterest Picks. I would love for you to stop by and visit and don’t forget to grab a feature button! Thanks again!
Your tutorial is amazing! Thank you for sharing. I think I will finally be able to sew a skirt soon as I’m a beginning sewer who has stuck to tote bags and pillows.
I love this! Thank you so much for sharing this with us. I love Maxis! We will soon be going on a 5 day cruise and I need some easy dressy cruise wear. Mix and match is best. And I have the prefect piece of material for one of these in a print.
Hey, I just stopping by and wonder if anyone needs some ideas on what to wear with their maxi skirts. I just discussed about it in my blog, feel free to visit..
Thanks for the great photos and easy instuctions. I am going to use this for an introductory lab in knit fabrics for my second level students. Awesome!
I am going to make a maxiskirt from this pattern, thanks so much! I’m twelve, and I love sewing. I’m short, so I don’t need to get clothes often and I HATE shopping for clothes, but I am in a growth spurt now and a comfy maxiskirt will be perfect.


that is lovely! thanks xx
Come visit my blog at:
Leigh at The Sewing Diva
I’m doing 5 his skirt this week wish me luck what do u think about each section being a different color.
Love it! You look soooo good in it! And how great that it is actually comfortable!
I love it!! I linked to your tutorial on Craft Gossip Sewing:
http://sewing.craftgossip.com/tutorial-tiered-maxi-skirt/2011/02/28/
–Anne
Thank you so much….what a great skirt and tut :)
I’m a new follower from Texas Monkey All About You Link Party.
What a great tutorial, it seems so easy that I could maybe do it!
http://simplesweetnessblog.blogspot.com/
This is very pretty and so comfy looking!
So pretty! Love the color you chose. You look really pretty in the pics! –SaraLyn
Look at you on u-create AGAIN…You’re so famous! Love the skirt, hooray for another tutorial!
P.S. I love how you look like you’re on the verge of cracking up in the first pic!
awesome, awesome! it looks fabulous on you, and so easy to make. thank you!
That looks amazing. Thank you for sharing the tutorial. I’m your newest follower. I would love it if you linked your project up to my link party.
More The Merrier Monday.
http://diyhshp.blogspot.com
gorgeous! i see these in my future….
beautiful beautiful! love the skirt and great pics too, you’re a model! :)
Just a quick note to let you know that a link to this post will be placed on CraftCrave today [01 Mar 12:00am GMT]. Thanks, Maria
this skirt is just too cute!! i love the whole outfit!
http://inthehammockvintage.blogspot.com
This is awesome! I found a couple of 4X shirts for $1 at Walmart that I’m going to try and make into this skirt.
This is honestly one of my favorite patterns I’ve seen on the craft blogs since I’ve started. Not only is it in the realm of my abilities, but it’s so sheik and pretty. Plus the photography is gorgeous, and I love the tute color.
Sorry about gushing, this was just a real treat first thing in the morning.
Love that your skirt is not all fluffy but elegant. Yes! I will make this, not just put it in my make-someday pile. Thanks for the tute.
Wow Abby, you are GORGEOUS. Pretty darn sure you could pull off the horizontal stripes.
Great work!
Cheri
This is fabulous! I was just saying I needed a cute skirt! Thanks for the tutorial!
Beautiful tutorial!! Can’t wait to try it out :) I’m a new follower – check out my blog if you’d like
Love the skirt, love the colour and love the tutorial! have shared it with my readers too ;o)
Love this! I’m teaching myself how to sew and I’d love to be able to make this one day…:) Thank you for such a thorough tutorial!!
C:)
You really do write some of the best tutorials. I love this skirt and I might actually try make it sometime in the future.
Thank you for sharing.
I am just wondering where you bought your fabric from and what type it is
Krystal – I found my fabric at JoAnn, and it’s a Polyester/Rayon blend :).
Thanks so much for the tutorial. I made this last night in a little over an hour and it looks fantastic! I’ve been sewing for almost 30 years and have an overwhelming fear of stretchy fabric. I think this might have cured me. Thank you again!
Thanks so much for the tutorial. I just used it to create the waist of the my dream skirt. It is actually the one you have posted.
come check it out if you like
craftedbymama.blogspot.com
Love this! thanks for a great tute! I can’t wait to make one!
NICE, it turned out beautifully!!! I’m gonna be checking out the rest of your blog- stumbled upon it while looking up Maxi skirts :D Happy Sunday!
I’m working on this skirt and I’m having trouble since I’m just a novice with using this stretchy fabric. The fabric keeps bunching and I keep getting knots while stitching. Any advice? Thank you. By the way I love your blog and tutorials.
The Cake Engineer – It sounds like you may be having tension issues with your machine. I’d double check that your machine is threaded correctly, and also make sure the tension is on a regular setting, and also make sure you use a longer than normal stitch length. Hope that helps!
Thanks so much for the tip!
I have 1″ wide elastic would that be comfortable or should I just get the 2″ wide elastic like you have in your tutorial?
A girl after my own heart! If it’s not brushing the ground, it’s not a skirt. Thank you so much for this tute. I will be making ̶o̶n̶e̶ a few.
Wow girl, this is truly impressive! I’m not brave enough to make one myself, so I ordered one instead…your way is cooler!
http://skopjanka.com
Hi!
Im your follower!
I really really liked your blog!
Keep up the good work!
Do visit mine too at http://aliascreativelife.blogspot.com/
Alia
I love this skirt! I have a lot of white woven cotton fabric…do you think it would work for this or does it have to be knit?
Hi – Thanks for posting this tutorial. It looks great! I have a question: do you think this would work with a cotton lawn or cotton voile fabric? I’m looking to do something lighter than jersey.
Thanks,
Lisa
Do you have a pattern for the blouse as well?
I like how the design’s open to color blocking the fabric. Great DIY. :)
Thank you for recommending a ball point needle! I have never even heard of one and I have followed several other tutorials on other blogs using knits, no one ever mentioned it. I have it on my shopping list, as soon as I get one I will make this skirt. It looks lovely! Thank you.
I got a ball needle this weekend and made a gray maxi skirt. I love it! I also love your blog and added your button to mine, thank you for all your tutorials!
You can see my pics at: http://simplejoycrafting.blogspot.com/2011/10/maxi-skirt.html
What a great tutorial, the skirts look excellent.
great first project for me. i inadvertently bought fabric that you can see through. i’ve heard that silk fabric is difficult to work with, but i dont believe my skirt would be nice with polyester lining. what would you recommend?
fabruary.com
glamuary.com
Learning how to sew a dress is very easy. The only tricky part in learning this skill is learning how to draft a pattern as well as measuring your body. But once you learn these, everything else is easy.
This is SUPER CUTE!!! :D Love it! Thanks for sharing!!! I came over from Flame in the Darkness .
Blessings!
~Kristiana
You’ve inspired me to make my own! Thanks ;)
I made one! Thankyouuuuuuu for the tutorial!
Here, mine :) Sewsauce
Very impressive clothing line. I love the long skirt you have. You look very fabulous.
This is such a beautiful maxi skirt. The tiers add so much to it! I featured it today as part of Skirt Week at seven thirty three.
I found this tutorial on Pinterest and I think it is just fabulous! Thank you so much for sharing! I have featured this project on my Pinterest Picks. I would love for you to stop by and visit and don’t forget to grab a feature button! Thanks again!
http://thecraftyblogstalker.blogspot.com/2012/04/pinterest-picks_15.html
Your tutorial is amazing! Thank you for sharing. I think I will finally be able to sew a skirt soon as I’m a beginning sewer who has stuck to tote bags and pillows.
Your newest follower, Jess
http://thedelightfulcrafter.blogspot.com
How would you measure the fabric for a skirt without the tiers? Tips? Thanks!!
thank you so much :)
I love this! Thank you so much for sharing this with us. I love Maxis! We will soon be going on a 5 day cruise and I need some easy dressy cruise wear. Mix and match is best. And I have the prefect piece of material for one of these in a print.
Hey, I just stopping by and wonder if anyone needs some ideas on what to wear with their maxi skirts. I just discussed about it in my blog, feel free to visit..
http://whattowearwith.weebly.com/maxi-skirt.html#.UQDAPydkzLM
thanks for the tutorial, the skirt looks great!
need to make one.
Thanks for this great tutorial – I made my own version, and was so pleased with how it turned out! Thanks so much!
http://handmadebyrebekah.blogspot.co.uk/2013/05/purple-maxi-skirt.html
Absolutely love the skirt, will be making one as soon as I find the right fabric.
Is it possible to have a pattern for the blouse you are wearing, it looks gorgeous
Thank you for keeping me in inspiration
Louise x
I love this. So cute and thrifty. Will be making soon with some super cute zebra print I got out of the remnant bin and my new serger! Thanks!
Thanks for the great photos and easy instuctions. I am going to use this for an introductory lab in knit fabrics for my second level students. Awesome!
I am going to make a maxiskirt from this pattern, thanks so much! I’m twelve, and I love sewing. I’m short, so I don’t need to get clothes often and I HATE shopping for clothes, but I am in a growth spurt now and a comfy maxiskirt will be perfect.