DIY Ruffle Sleeve Tutorial

There are so many fun sleeve trends this year, and ruffle sleeves definitely top my list of favorites! Today I’m sharing how easy it is to take any existing top (or dress!) pattern and add ruffles with a DIY Ruffle Sleeve Tutorial.
*This post is sponsored by Jo-Ann Fabric and Craft Stores. All content, photography, and opinions are my own and genuine.

I love that ruffle sleeves can be dressed up or down, depending on the pattern used, the fabric used, and how they are styled.

For this ruffle sleeve top, I used a jersey knit from Jo-Ann Fabric and Craft Stores for a casual-yet-put-together look. I had been eyeing the heart print for some time, and was excited to finally get to sew with it!


Ready to make your own ruffle sleeve top?


Here we go!

Supplies:
sleeved top pattern (I used McCall’s M7286, which is a raglan style knit top, but a woven top pattern or traditional sleeves will work just as well!)
fabric (per pattern requirements +1/4yd)
basic sewing supplies – thread, pins, scissors, etc
To begin, cut all pieces as directed in pattern. When cutting sleeve, cut to length you would like ruffle to start at, plus 1/2” for seam allowance. For my top this was 7” from the underarm point.

Measure width of bottom of sleeve, and cut 2 bands twice as wide as the width of the sleeve bottom, by the length you would like your ruffle plus 1” for seam allowance (if using woven fabric, add 1 1/2” for a 1” hem allowance). I cut my ruffles 5” long for a 4” finished ruffle length.


Sew two rows of basting stitches, 3/8” and 5/8” from top of each ruffle piece.
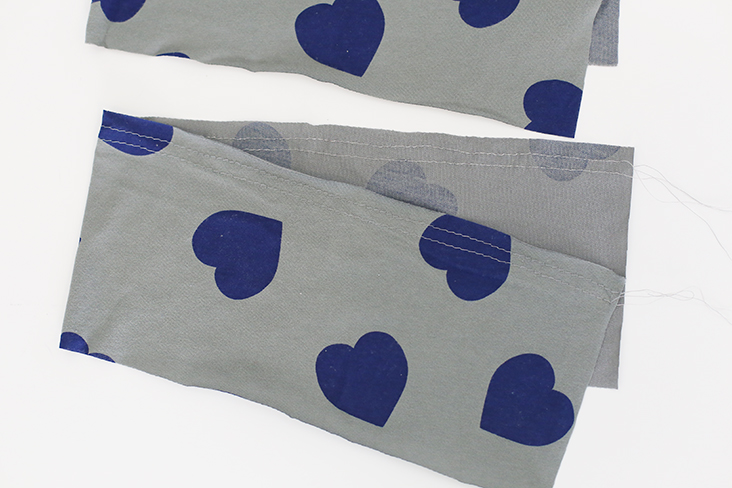
Pull bottom threads only to gather each ruffle to fit bottom of each sleeve and pin right sides together, matching top of ruffle with bottom of sleeve. Stitch between basting stitches, 1/2” from edges. Remove basting stitches that are visible on right sides of ruffles.

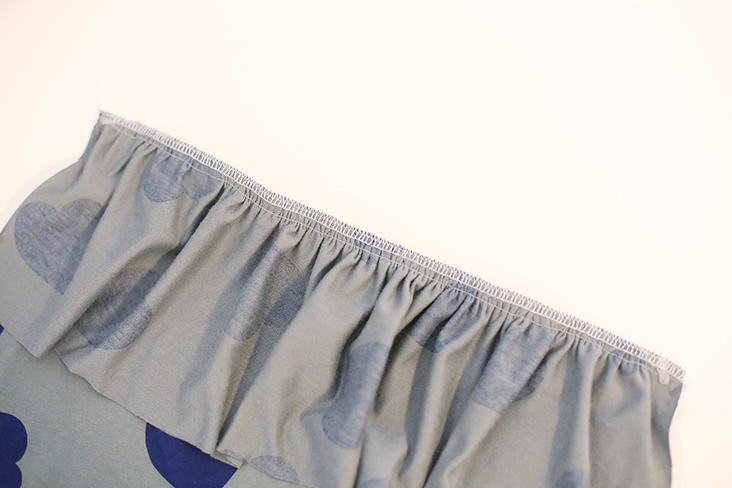

Press bottom of each sleeve 1/2” toward wrong side (and another 1/2″ if using woven fabric). Use zig zag stitch or cover stitch machine to hem bottom of ruffle. If using woven fabric, it is best to hem after the sleeve sides have been sewn together.


Assemble remainder of top as directed in pattern. The steps I followed pertain to a raglan style top, so adjust your construction method accordingly for different styled tops. Sew the sleeves to the front and back…


Press the neckband in half and open it up to stitch the short ends right sides together. Pin it evenly to the neckline (stretching the neckband to fit), and stitch along the pinned edges. Press with steam to help set neckline and neckband nicely in place.


 Next, sew each side seam from the ruffle hem to the bottom of the shirt.

Lastly, hem your top! I adjusted the pattern’s hem to a slight high-low hem, and hemmed it with my cover stitch machine.

Great job! Style your new trendy top with some ankle boots and your favorite jeans, and you’re set!


That is such a fun fabric! I love ruffle sleeves!
Do you have any suggestions for making this into a plus sized top?
Hey Linsday! Really this works for all sizes, just adjust the ruffle length based on the size of your sleeve opening!
WHAT’S the name of the fabric you used I love it!
It was a fabric from JoAnn that I haven’t seen in the stores anymore unfortunately! It’s a great one though!