DIY Herringbone Headboard

Today’s DIY herringbone headboard project ranks as one of my very favorite projects ever. It was definitely fun to learn how to make a herringbone headboard, and I’m so excited to share the finished project with you today!

 Note: This post was originally published in 2014 and has been updated on 3/30/2020. While I still love this DIY herringbone headboard even six years after making it, it was time for some decor changes around it, and these photos reflect the current decor!

This was how it looked when I first published this post.


It was definitely time for some updates, and I had had my eyes on these midcentury modern nightstands from Wayfair (affiliate link) after seeing them on my friend Delia’s IG feed. I learned the hard way that the acorn color I wanted sells out quickly, but you can sign up for an email notification of when it’s back in stock so you don’t miss out (which I did the first time, but made sure to grab them right away when they came in again the next month!).
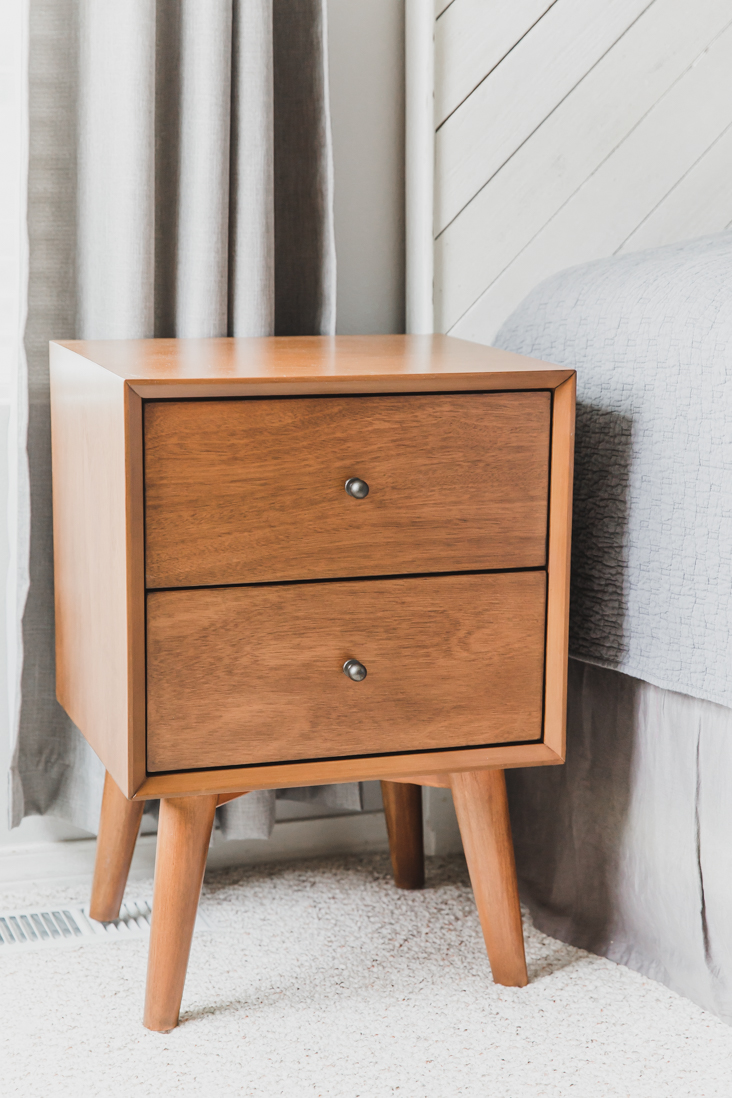

I love that this headboard will probably always be in style, and can always stay modern with a few updates around it.

I made the fun DIY Tic Tac Toe pillow with my Cricut Maker, iron-on, and leather, and love the subtle pop of pink and texture it adds. If you’re looking for more fun DIY pillow projects to sew, check out this post.
Or for another fun home decor project, let me teach you how to make a table runner!

If you’re looking for another fun DIY wood project, try our wood crate bookshelf tutorial. And also be sure to check out how I used vinyl tile stickers to makeover our fireplace!

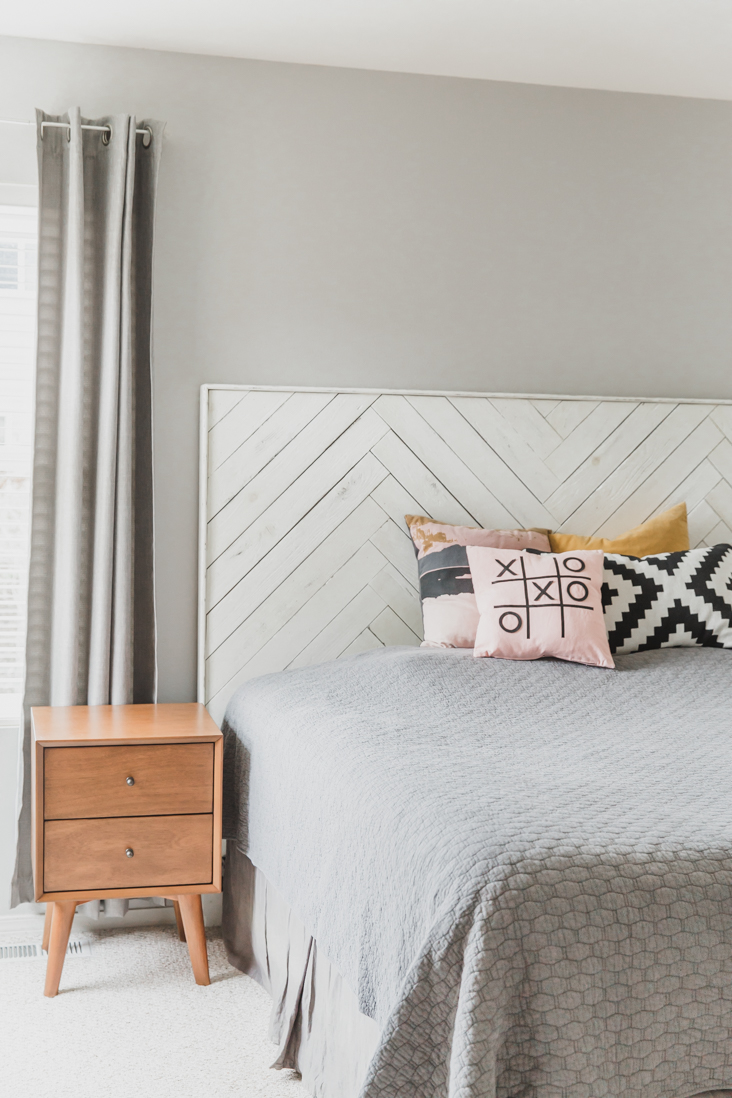
I really love it all together. A lot. It’s still exactly what I would make if we were to make a new DIY headboard.

Joel drew up the plans for the herringbone pattern, making sure it would all be symmetrical, and we worked together to put the headboard together. I even did the nail-gunning, which is out of my normal comfort zone. I usually leave the power tools (other than the sander) to Joel, but with him cutting boards while I nailed them in place, it went together pretty quickly. As you can see, we attached the pattern to a plywood backing that Joel attached the legs onto.

Joel trimmed the edges flat and added a border around the headboard, and then we brought it inside for a few months. The boards were damp when we bought them, and we wanted to make sure the cedar was really dry before it was stained and painted.

Once I could convince Joel to haul it back out to the garage for me, I stained the headboard dark walnut so that when it was distressed the dark would show through.


Next I covered the stain with white paint. I kind of liked the look after one coat, but decided to keep going. It took about 6 coats in all with our paint gun, I think, to get the coverage I wanted.


To give it an aged look, we distressed it by hand with sandpaper, bringing the dark stain back through the white.
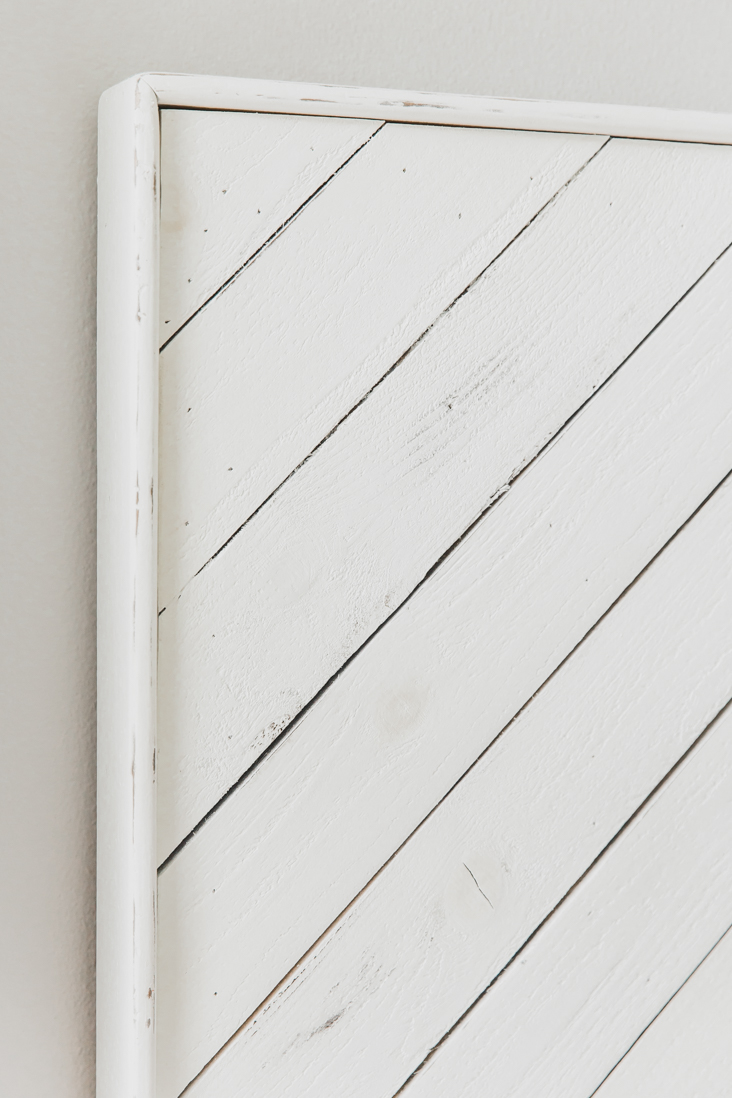
The headboard was finished off with several coats of satin Polyacrylic to protect it.


I couldn’t have been happier when we finally got the headboard back into our bedroom, and even happier that we got it done before Hattie came along. (Update: it’s crazy to read that sentence now that I’m updating this post and Hattie turned SIX a few days ago!).
My husband drew up the plans for the headboard in SketchUp, and here’s a screenshot that shows measurements for placing the herringbone pattern correctly. This is for a king sized bed. If you make a DIY herringbone headboard of your own, I’d love to see how it turns out!


I love this so much!
This is incredible Abby! I love how it looks in your bedroom. I think it’s so fun to work on projects with my husband, too!
Can I just copy your bedroom? thanks. ;) I love it all! Especially that headboard. I need it in my life.
I love everything about your room! and I want your bedspread!
I love it! Great job! You have such great taste. Simple and clean. So nice. Congrats on Hattie by the way, she is a DOLL!
This headboard is really impressive and beautiful.
Great job with the headboard. love it!!
This is GORGEOUS! I love that it has a rustic feel with a modern twist! Well done!
Thanks for linking up to Take-A-Look Tuesday over at Sugar Bee Crafts – your awesome project was featured yesterday!!
–Mandy, SugarBeeCrafts.com
I LOVE this! The chippy white paint, the pattern and well…I just love everything about it! Thanks so much for sharing at The Makers! Pinned :)
Hi Abby, I just wanted to let you know that this is one of the party features this week at The Makers! I hope you will stop by and join us again today or later this week :)
Have a beautiful day!
~Katie
Heya i am for the first time here. I came across this board and I find
It truly useful & it helped me out a lot. I hope to
give something back and aid others like you aided me.
This article is in fact a good one it assists new internet viewers, who are wishing in favor of blogging.
What size boards did you use? 1X2s? What size bed do you have? Im trying to draw up the plans for a full size bed
We used 1x4s for the herringbone pattern :).
Those look way too small for 1×4’s. It is cool, though.
They’re definitely 1x4s, hehe ;).
Can you post the plans he drew up for this?
Along with the measurements
Hi Ariel! I’ve added a screenshot of his plans that helped to place the herringbone pattern correctly. Hope it helps!
Thank you so much I’m excited to try it!
Love this headboard! Do you happen to have the dimensions of the finished product?
how long are the 1×4’s cut for the main pieces?
That’s a good question ;). If I can dig up any more of my husband’s plans, I’ll update the post with more measurements.
Yes please! I would love to know this as well :-). I’m making this right now!
I know people have asked this before, but I didn’t see an answer and am trying to construct–how long are the red boards on the diagram? Would you be able to measure one of the center ones? We love this so much! I don’t want to mess it up!
Hi Jennifer! The center boards are 29.5″ long, but they did shrink about 1/8-1/4″ after being inside (we placed them all flush together and you can see in the finished photos there are small spaces). I hope that helps! I’m working on getting my husband to write all these details out for me ;).
How much did the wood all cost!?
And what size of wood did you use to frame it in with!?
We used 1x4s to frame it, and my husband routered the front edges to be curved.
I unfortunately can’t remember what the wood cost, but it wasn’t too expensive, especially compared to what we would’ve spent on a pre-made bedframe.
Thanks so much for the inspiration. We used your post as a basis for making our own Bedhead and I can’t be happier with the results. We went with a lightly lime washed pine look.
Looks great! How long are the cut (full) pieces you used to make the pattern?
Can you use pallet wood too?
You definitely could, you’d just have to make sure it is free from any harmful chemicals that pallets sometimes harbor, and adjust your measurements to fit your board sizes!
Can you tell me if all of the words were put together flush with each other Or was there a slight space between the boards? I can’t tell from the pictures if there is a space or if that is just darker stain.
Hi Heather! The boards were originally placed tightly together, but spaced out as the wood lost it’s moisture. :)
My husband and I made this headboard today. We are in love with it. Thank you for the inspiration. Can’t wait to finish it.
How many 1×4’s did you buy for this headboard & what sizw of headboard did you make?!
i saw that she said it was a King, not sure how many 1x4s!
this is so beautiful! i am planning on making it this weekend. I already have a bunch of 1x4s i just need to get the plywood. what is the final height? i see the final width on the plans but not the height
Hi Kate! I’m not sure how many 1x4s we used, but if you figure out the total length you’ll need you should be able to calculate it that way. One of these days I’ll get my husband to write out all the measurements to save others a few more steps!
Hi, I’m trying to save myself allot of time. I saw in a part the measurement of the longest board was 29 something. Do you have the measurements for all the cedar planks to make the herringbone? Also, what thickness and size is the plywood backing?
Hi Monica! I don’t have the measurements other than what’s listed on the diagram, but I believe we used 1″ thick plywood. Hope that helps!
I just finished making mine using your template and I’m in love with my new headboard! Thanks for posting
Awesome, I’d love to see it!
Did your husband ever figure out how many 1 X4 you guys use? Starting on this project :) and I am unsure how many to get1
Love this so much! Working on it this week during our Quarantine – is observing if there’s any more updates on dimensions. This is the first project we’ve made like this. Let’s see how me and the SO work together – lol!
What is the thickness of the plywood? Thank you
How did you attach the 1×4 to the plywood?
What size lumber is used? What’s the backing?
We used 1x4s, and the backing is plywood.
How long were the 1×4 that attached to the bed frame and what are the dimensions for the plywood.