DIY Tic Tac Toe Pillow Tutorial – and Cricut Maker FAQ!

Can a person ever have to many throw pillows? I think not. And if you agree with me, today’s project will be right up your alley! I used my Cricut Maker and some fun materials to make a new modern throw pillow for my living room, and it was all a match made in heaven! Today I’m sharing this DIY Tic Tac Toe Pillow Tutorial (sponsored by Cricut!) so you can make your own!

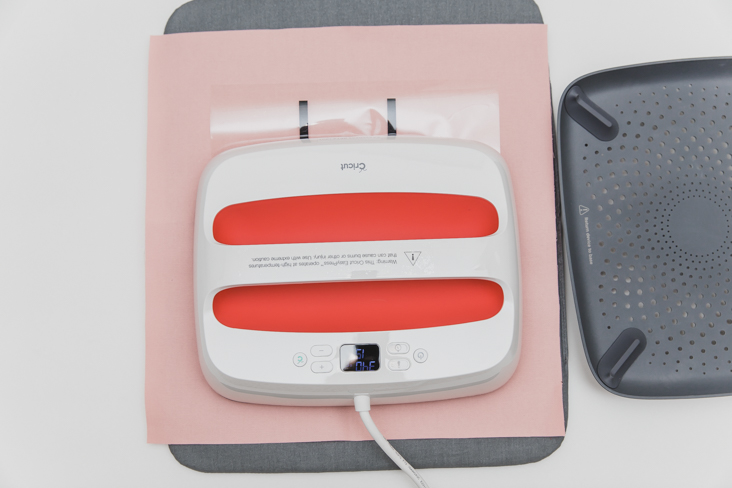
First, let’s talk about the materials. As you’ll read more about below (I’m answering some top Maker FAQs!), the Cricut Maker is so versatile in what it can cut. You can see some of my favorite ways to use the Cricut Maker for sewing here. For this throw pillow tutorial, I used both Cricut genuine leather (I love that they have it as an option to purchase!) and iron-on, and the Maker cut through both with ease. I think the textures/sheens look so pretty together!


I paired the leather and iron-on with a light pink canvas I had leftover from the wall pocket organizer tutorial that I made for my girls’ room.


This pillow is sized 16×16″, but you can easily adjust it as you’d like!
And check out this post for more fun pillow ideas!

Since making it, this pillow has bounced around to different places in my house, but most recently has found it’s way to my bed, as a perfect compliment to our DIY herringbone headboard.
It was fun to use both the fine point blade and knife blade for this project. I love that Cricut has made it easy to cut so many different types of material, from balsa wood, to fabric, to iron-on, and that it only takes seconds to switch one tool out for the other.

As you know, I’ve been using my Cricut Maker for everything from a backpack to the sweetest tiny baby pants ever, and as I’ve shared my projects, I’ve also had a lot of questions about the Maker itself. Before we jump into today’s project, I wanted to answer a handful of the most common questions people ask about the Cricut Maker. And for even more info, you can also read my 10 Reasons Why Every Crafter Needs a Cricut Maker post.

Will I use the machine enough to justify the price of the Cricut Maker?
- If you are reading this blog, you most likely love to sew, and in that case, I can whole heartedly say that the Maker is worth the price. While other Cricut models such as the Explore Air 2 can still cut a wide variety of materials, the rotary blade and the ability to cut many different types of fabrics without a backing is the deal breaker for most sewists, and for me personally. I’ve surprised myself with the different projects I’ve ended up using my Maker for – from quilting to today’s project with leather, I have found myself finding an excuse to use it somehow with almost all of my recent projects!
What materials can I cut with the Cricut Maker?
- As I mentioned above, the Maker is the most versatile of the Cricut family. You can cut everything from vinyl, to iron-on and leather (I’m using both in today’s project), to almost every type of fabric, to really thick and dense materials like balsa wood and matboard! The adaptive tool system allows the machine to transition seamlessly from one material to the other, taking all the guesswork out of it for the user.
Will it be easy for me to learn the software?
- If I had to pick a second favorite thing about working with the Cricut Maker, it would be the software. After using other cutting machines in the past, along with the accompanying software, one of my biggest frustrations has been in working with the software. Design Space is by far the most user friendly in my opinion. It’s very intuitive, and simplifies the process while still allowing you to customize things however you’d like. And if you do ever have questions, there is a great help section on Cricut.com that includes videos for working with Design Space.
What kind of DIY projects can I make with the Cricut Maker?
- Perhaps this question should be, what kind of DIY project can’t I make? ;) But really, it’s a pretty much if you can dream it, you can make it. If you love to design your own projects, Design Space makes it easy for you as you can either upload your own images (I’ll share more about that in the next question), or use their huge selection of images to create whatever project your heart desires. I’ve even designed fun mom-themed fanny packs with my Maker! And if you’re the kind of person who prefers to let someone else do the dreaming so you can get right to the making, that’s just as well! Design Space has a large catalog of ready-to-make projects that you can adjust as you’d like, or make as is. The ready-to-make designs range from accessories, to projects specific to certain tools like the knife blade, to home decor projects.
Can I upload my own images in Design Space?
- You bet! This is the feature that I probably use the most in Design Space. I often create images/graphics outside of Design Space, and it’s super easy to upload them. You can upload a wide range of file types, including JPG, GIF, PNG, SVG, and DXF. Both basic images and vectors are accepted, which makes it perfect for both those new to the cutting machine world and those who are seasoned graphic designers. I most often use Adobe Illustrator to create my images/graphics, and then upload them into Design Space as SVG files.
Feel free to comment with any additional questions you have, I’d love to help answer them!

Ready to get started on your pillow?

DIY Tic Tac Toe Pillow Tutorial
Supplies (affiliate links below to find each item at Cricut.com):
fabric – cut 2 17×17″ woven fabric squares for pillow front and back – I used pink canvas
16” pillow form – 2
11” non-separating all purpose zipper – 2
Cricut Maker
Cricut genuine leather (black) – one 12″x12″ piece – if using scraps, you’ll use approximately half of one piece
Everyday iron-on – black
Cricut EasyPress 2 – I used the largest size, 12″x10″, and it was sooo great for this large pillow!
Cricut 12×12″ mats – medium hold (for iron-on) and strong hold (for leather)
Cricut fine point blade (for cutting iron-on)
Cricut knife blade (for cutting leather)
Rotary cutter, ruler, and mat
Basic sewing supplies – thread, pins, scissors, measuring tape
Wonder Tape (optional for installing zipper)
Tic Tac Toe Design Space Project

*All seam allowances are ½” unless otherwise noted. Finished pillow covers will be 16×16”.
Open Tic Tac Toe Pillow in Design Space. Click “make it” to open the project and “make it” again to get started cutting! 

First, the everyday iron-on will be cut. Make sure you have the fine point blade loaded in your Cricut Maker. Use a rotary cutter, ruler, and mat to cut a 12″ length. 
Place the iron-on shiny side down onto the medium hold mat. In Design Space, press “continue” and select “iron on” as the material. Following the prompts, load the mat into the machine. Once the mat is loaded, press “C” to start the cutting. 


Once cut is complete, unload the mat and use a weeder to remove the negative vinyl. Peel the plastic from the mat. Next we’ll cut the leather, so the iron-on can be placed to the side for now. 
To cut leather with the Maker and knife blade, first make sure the knife blade is loaded correctly into the machine. Cricut also recommends to trim the leather width to 11″ wide and to tape the edges of the leather on the sides to help hold them in place. I omitted the tape as my mat was new and I felt like the leather was really secure on it, and it worked well, but as my mat loses it’s grip I probably won’t skip the tape to be safe. Lastly, move the white star wheels to the side. Cricut recommends to move them all to the right, but this time I split them between each side and then centered the leather on the mat as you’ll see below.
Place the leather shiny side down and centered on the strong hold mat (if you moved all of the star wheels to the right, you can align the leather to the left edge of the mat and ignore the next step–>). Because the leather is 11″ wide instead of the mat’s 12″ width, adjust the left outer edges of the Xs and Os in Design Space to be along the 1″ mark. Use a brayer or other object to firmly press the leather into the mat (this is important!). 

If you choose Cricut Genuine Leather as the material in Design Space, it is set to cut with the deep cut blade, with no option to adjust the tool to the knife blade, so we are going to choose “2-3oz. Garment Leather” which will have the knife blade as the default tool. 

Load the leather into the Maker and press “C” to start the cutting. The 2-3oz. garment leather setting will complete 4 passes, so be patient as it will take a little time. 

Once cut is complete, unload the mat and remove the negative leather. I saved the inner circles because I’m sure they’ll come in handy on another project! Carefully peel the Xs and Os from the mat. 


Next, we’ll fuse the iron-on to the pillow front. Be sure the grid is centered. I love to use my Cricut EasyPress 2 because the heat temperature is precise, is delivered evenly, and the surface is large enough on this size (12×10″!) to cover the whole iron-on piece in just two sections. If you don’t have an EasyPress, you can use a household iron. Use this guide to set the correct temperature and timing for your fabric/iron-on and fuse accordingly. Don’t forget to also press from the wrong side of the fabric – it will help it adhere much stronger! Peel off the protective plastic. 
Now that the grid is fused to the pillow front, we can attach the Xs and Os. I like to use Wonder Tape to hold the letters in place temporarily and then sew them on, but you could also use a permanent fabric glue if you’d prefer. For me, if sewing is an option, I’ll always choose it ;). Make sure to use a leather needle to help get through the thickness well! 

Once the letters are stitched on, it’s time to add the zipper! Place the zipper right side down, centered along bottom of pillow back and mark top and bottom zipper stops with pins. 
Right sides together, pin and stitch pillow front and pillow back together along bottom edge, using normal stitch length outside of pins and basting length between pins. Press seam allowance open and finish raw edges – if using serger, do not trim any fabric. 

Use Wonder Tape or pins to align the zipper (right side down) along press seam allowance, centering zipper teeth with basted stitch line. 

From right side of fabric, stitch ¼” from each side of basted stitch line, stitching across at zipper top/bottom stops where pinned, forming a rectangle. Stop, lift presser foot, and adjust zipper pull as needed to avoid it getting in the way of the presser foot (a zipper foot will also help with this). 
Use a seam ripper to carefully remove basting stitches. 
Open the zipper partially. Right sides together, pin the pillow front and back together along the three unstitched sides, matching raw edges. Stitch along pinned edges. 
Trim the corners and finish seam allowances with serger or zigzag stitch. 
Turn pillow cover right side out and press flat. Insert pillow form, and voila! 
Great job, you’ve finished our Tic Tac Toe Pillow Tutorial using your Cricut Maker! Be sure to check out more of our Cricut projects for more fun ideas!

This is a sponsored conversation written by me on behalf of Cricut . The opinions and text are all mine.


