Halloween Trick or Treat Bag Pattern – Free!

Do you have fond memories of putting on a costume and hauling around a homemade trick or treat bag on Halloween, trying to fill it with as much candy as possible like I do? Of course nowadays we’d call it “DIY” trick or treat bag, and since I’ve loved making them for my own kids over the years, today I’m sharing this Halloween trick or treat bag pattern (free!) with you!
You can choose to follow along with either the photos or video tutorial below, and before you know it you’ll know how to make a DIY Halloween bag that any kid will love to collect their treats in!

Bag Details
You’ll learn how to sew a simple lined tote bag with boxed corners, and you can use either the free cut file or applique template choose from 3 images for the bag front!

The finished bag is 14×14″ (11.5″ along the bottom edge), so roomy enough for even the teenagers to be happy, but not too big for little ones to tote around. If you’re looking for DIY costume ideas, I’ve got you covered here.

Skill Level
This treat bag tutorial is suitable for confident beginners and beyond! The trickiest part is dealing with the bulky layers, but with a good sewing needle and a little patience you’ll be golden.

What fabric is best for a DIY Halloween Trick or Treat Bag?
To sew this trick or treat bag pattern, I recommend using a medium weight woven cotton fabric, such as quilting cotton.
You’ll need lightweight fusible interfacing to help give the fabric structure, and I also recommend using fusible fleece (applied over the interfacing for best results) to give the bag body and help it hold it’s shape. It’s one of my favorite secrets for making a professional looking bag!

Heavier weight fabrics such as denim or cotton duck will also work well. If using cotton duck, you can often eliminate the interfacing because it’s very stiff on it’s own and is great at holding it’s shape.
More DIY Halloween Fun
Why should Christmas get all the fun? Give Ugly Halloween Sweaters a chance, and create the easiest (to both make and wear!) DIY costumes.

Need more DIY costume ideas? Check these out…
DIY bank robber costume
DIY witch costume (+ free witch hat pattern!)
DIY baby Elvis costume
DIY cactus costume
DIY cavemen costume
DIY bunny costume
DIY mummy costume

Supplies to Sew a DIY Halloween Bag
(affiliate links below)
100% cotton exterior fabric – 1/2yd – I used this 2yd precut from Walmart
100% cotton lining fabric – 1/2yd – I bought a few of these fun prints cause they were too cute to decide on just one!
lightweight fusible interfacing (Pellon SF101 is my go-to) – 1 1/4yd (20″ wide)
fusible fleece (optional but I recommend to give the bag body and help keep it’s shape) – 1/2yd
size 14 sewing needle and basic sewing supplies such as scissors and clips or pins
Iron-on vinyl (pattern download includes images that can be used to create appliques with felt/fabric and Heat N Bond if you don’t have a machine such as a Cricut Explore Air II or Maker to cut SVG files with)
Cricut Explore Air II or Maker
Cricut EasyPress 2 or iron
ACCESS FREE PATTERN DOWNLOAD HERE (read info below before ordering).
Follow the checkout process at the link above (no payment info will be asked for), and once that’s complete you’ll automatically be emailed the download link (be sure to check your junk mail if you don’t see it in your inbox and that you spelled your email address correctly)!
Once ordered, you can also access the pattern downloads via your account by logging into your account under the “shop” tab of our site). Entering your email address on our newsletter signup form is not how you access our free pattern downloads (although I always give our newsletter subscribers heads up to our newest patterns!).
Download will include 2 separate files:
– 1 PDF for printing the Trick or Treat Bag pattern on regular A4 (8.5×11″) paper with your home printer (pages 7-10 are only necessary to print if creating felt/fabric applique rather than use cut file below)
– 1 SVG for cutting Iron-on with your Cricut Explore Air II, Maker, etc
Trick or Treat Bag Video Tutorial
If you prefer learning via video, watch it below to be guided from start to finish. You can also view it on YouTube here, along with all of our other video tutorials!
How to Assemble and Cut DIY Halloween Bag Pattern Pieces
Print pattern pieces (and PDF file for applique if not using Iron-on), ensuring that file is set to print at 100% (and not set to scale). You can double check this with the 2″ square on the first pattern page. Tape pattern pages together along borders.

Cut all pieces as directed on pattern pieces and make small 1/8″ snips inward at notch markings. Trim approximately 1/4″ from interfacing edges and 1/2″ from fusible fleece edges (excluding handle fusible fleece pieces).

Apply fusible interfacing to exterior bag front, back, and handles. I LOVE to use my Cricut EasyPress 2 for this, it’s so darn handy and so much faster than using an iron!

Apply fusible fleece over interfacing (read below for instructions on applying fusible fleece to handle pieces). Fusible fleece will melt directly under an iron, so center the fusible fleece over the interfacing (on wrong side of exterior fabric), then carefully flip over so it can be pressed from the right side of the exterior fabric.

Before applying fusible fleece to the handle pieces: Fold and press one handle piece in half wrong sides together, matching long edges.

Open center fold, bring each long edge to center fold, and press in place. Fold back along center fold and press.

Open folds and slide fusible fleece next to center fold on one side. Fold handle along all folds again and press from whichever side is closest to fusible fleece adhesive side to attach fusible fleece.


Repeat to attach fusible fleece to other handle piece.

Cut Halloween SVG Files from Iron-on
Open Cricut Design Space (or other cutting software compatible with your machine) and upload SVG file included in the free download above into a new project.
Ungroup the three objects. You can also delete any that you’re not planning to use at this time. Click “Make It” in the top right corner.
Place the Iron-on shiny side down on a mat and follow the onscreen prompts to load it into the machine. Be sure your fine-point blade is also loaded, don’t forget to mirror the BOOYAH image, and press “C” to start cutting!

Unload the mat when cutting is complete and use a weeding tool or tweezers to weed the image.

Apply Iron-on to bag front with EasyPress 2 or iron, centering.
Note: you can also elect to wait until you’ve sewn the entire Halloween bag before applying the Iron-on. I prefer to do it first, but be cautious to stay away from it with your iron in future steps (ask me how I know!!).


Allow Iron-on to cool and then peel plastic off.

Create Applique for Bag Front
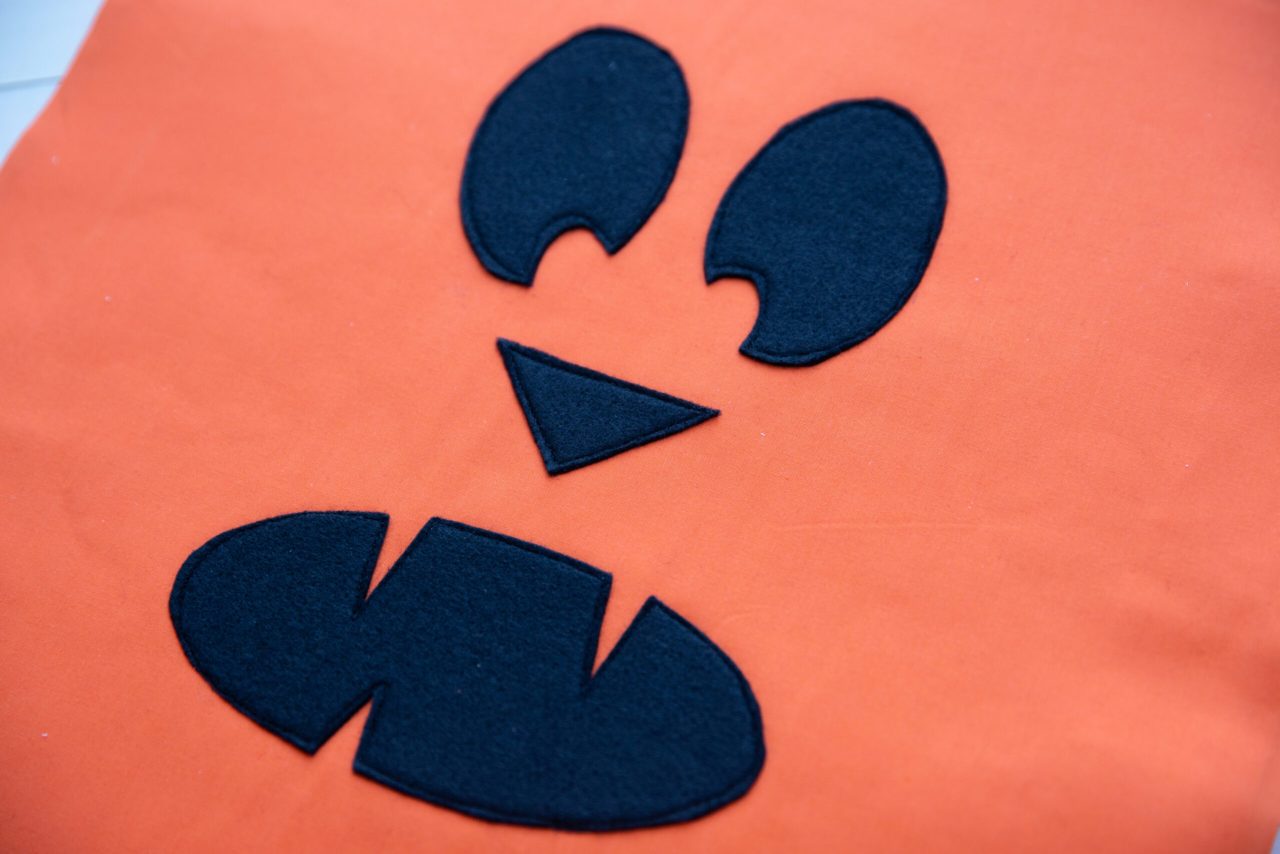
If you are using the PDF file included in the free download above to create an applique for the front of the bag with felt or fabric rather than use the SVG cut file and Iron-on, first choose which template you’d like and assemble the pages together if you haven’t done so yet.
Carefully cut out each shape from the template with craft knife or scissors – the outside paper can be used to help with shape placement on the bag front if it’s kept in tact.
Use the shapes to determine how much Heat n Bond you’ll need to fuse to your felt piece. Fuse adhesive side of the Heat n Bond to the felt, following manufacturers instructions.
Trace each shape onto the Heat n Bond and cut out. When using the “BOOYAH” applique, it will need to be mirrored because you’re tracing the design onto the back of the fabric.

Peel Heat n Bond paper from felt and use template to center shapes on bag front piece. Cover felt with parchment paper and follow manufactures instructions to fuse felt pieces to bag front.
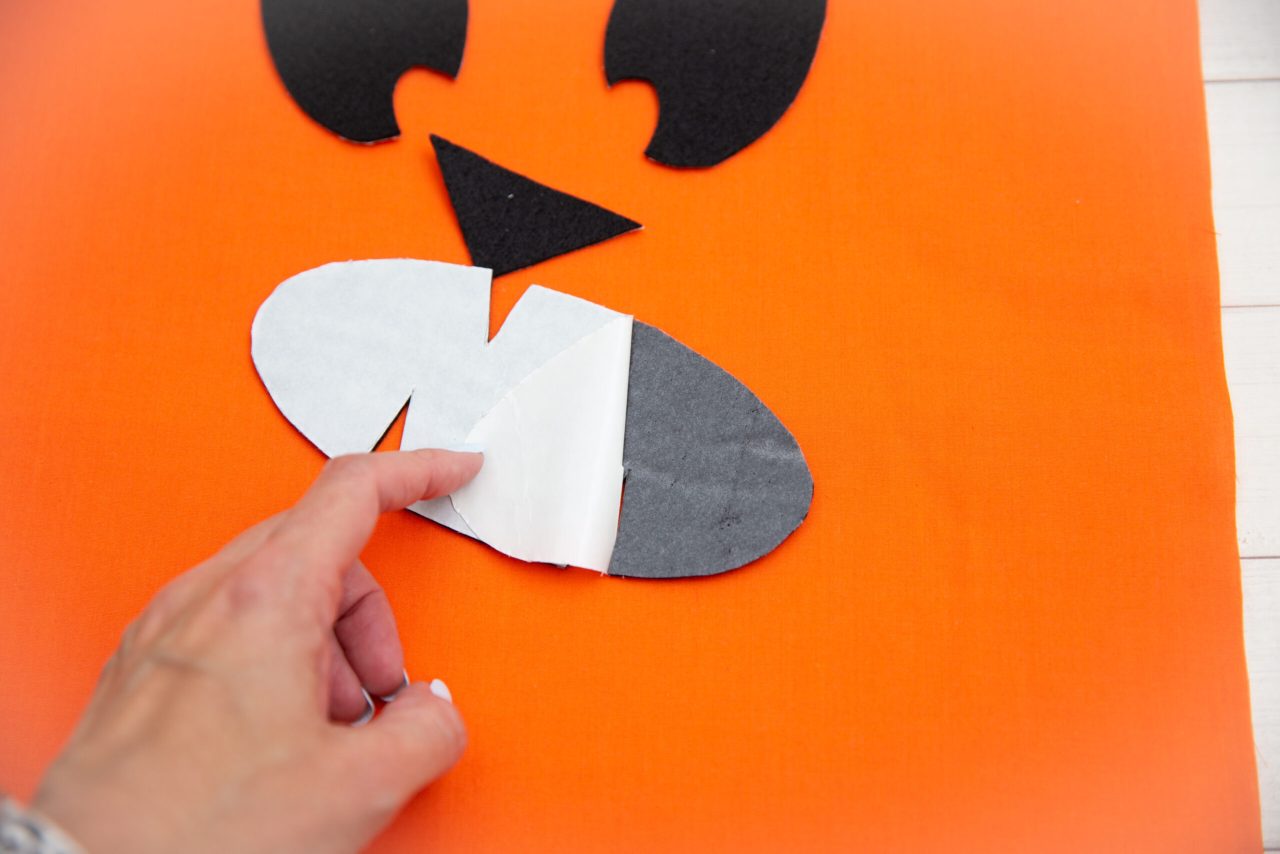

Once felt is fused to bag front piece, stitch around all edges of applique, close to edge, to secure in place.
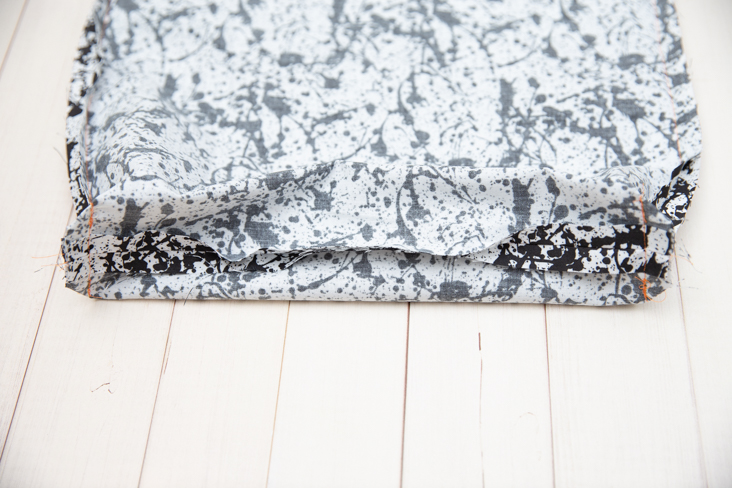
Create DIY Trick or Treat Bag Boxed Corners
*Seam allowances are 1/2″ unless otherwise noted.*
Right sides together, pin and stitch front exterior and back exterior together at side and bottom edge (bottom edge has the square cutouts). Press seams open. This can be tricky if you don’t have a pressing ham, but it can be helpful to wear an oven mitt and slide one hand inside the bag to give some pressure against the iron (just be incredibly careful doing this and keep your iron at a lower than normal temperature so you don’t end up with a burn!).


Repeat steps above with lining front and back pieces, but leave 5-6″ opening along bottom edge for turning the back through later on, and using a 5/8″ seam allowance. This slightly larger seam allowance will help the lining sit nicely inside the exterior bag when they’re joined together.

To create boxed corners, pinch one bottom corner opening of bag exterior, matching right side seams, and pin. Stitch along pinned edge, keeping seam allowances open on both sides.


Repeat steps to create boxed corners on bag lining. Our Halloween tote bag is starting to take shape!
Sew Bag Handles
Stitch close to long edge of one handle on both sides. Repeat with other handle.
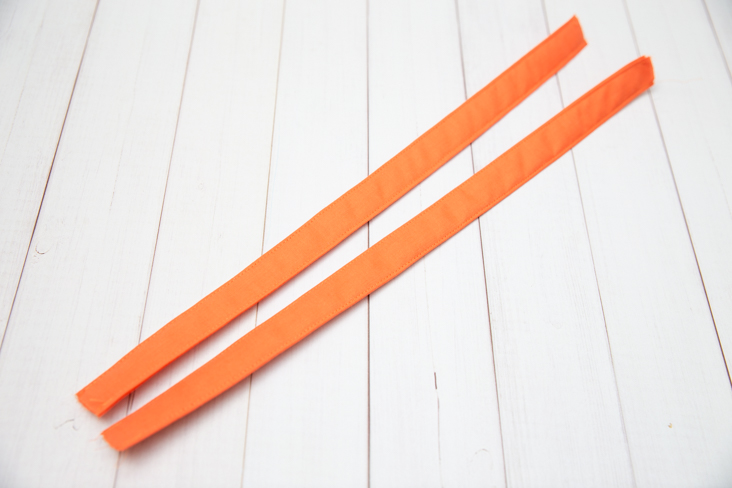
Right sides together, pin raw edges of each handle piece to markings at top of bag front. Repeat with opposite side of the bag (back) and stitch all in place, 3/8″ from raw edges.


Assemble Trick or Treat Bag Exterior and Lining
Make sure you left an opening in the lining bottom and if you forgot, here’s your friendly reminder to grab your seam ripper and do it now. Otherwise you’ll sew the bag completely shut and inside out in just a moment ;)…
Right sides together, slide the lining into the bag exterior and pin top raw edges, with handles sandwiched inside.


Stitch around the entire top of bag along pinned edges, backstitching at handles.

Turn bag right side out through the lining opening.


Press flat along top edge of bag and topstitch around entire top of bag, backstitching at each handle.

Pull lining bottom out of bag and topstitch near folded edges to close opening.

Push the lining back into the bag and voila!

You’ve finished this DIY Halloween trick or treat bag pattern and it’s ready to be put into action!
Find more free patterns HERE!


How do I get the free patterns?
Hi Donna, click on the link under the supplies section and it will take you to the page where you can order the pattern for free.